Interior Design Ideas & Fun Kid-Friendly Activities
Welcome – to the New Blog Inspired Living!
We aim to inspire, intrigue, and encourage Inspired Living through the provision of insider interior and outdoor design tips and tricks for blissful household maintenance, recipes, and more. We hope you will enjoy these monthly editions just as much as we love curating them for you. Happy reading!
With the season of Easter upon us, we thought it fitting to provide some design advice and tips for your Easter gathering. We think coming together as a family is important and we all deserve to treat ourselves to the simple pleasures in life, like a well laid table! So we’re giving you two tablescape ideas that will definitely have your family swooning. We have prepared these with faux florals all from our store and photographed them to share the vision with you. The faux florals are picture-perfect and can be stored easily for your next celebration!
FUN EASTER TABLESCAPES
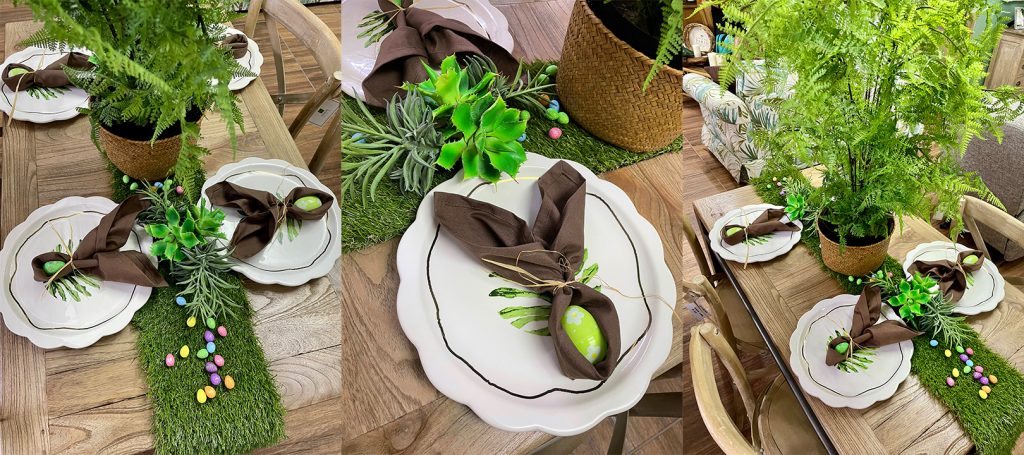
Bunny Ears on the Green: First, layout a faux grass runner across the table. Place a basket of tall faux bracken fern plants to serve as your evergreen centerpiece. Add colourful Easter eggs on either side for a pop of colour. Complete your table with leaf plates for an additional punch of greenery as well as other desired dinnerware. The addition of napkins in the shape of bunny ears completes the look. Here’s how to make them:
- fold napkin in half on the diagonal so it becomes triangular in shape.
- roll the napkin up starting at the triangular point so you end up with a long thin roll
- fold in two
- place an Easter egg inside the “U” folded section
- tie the two ends together at the top of the egg to keep it securely in place
- fluff and open out the two ends to resemble bunny ears
|
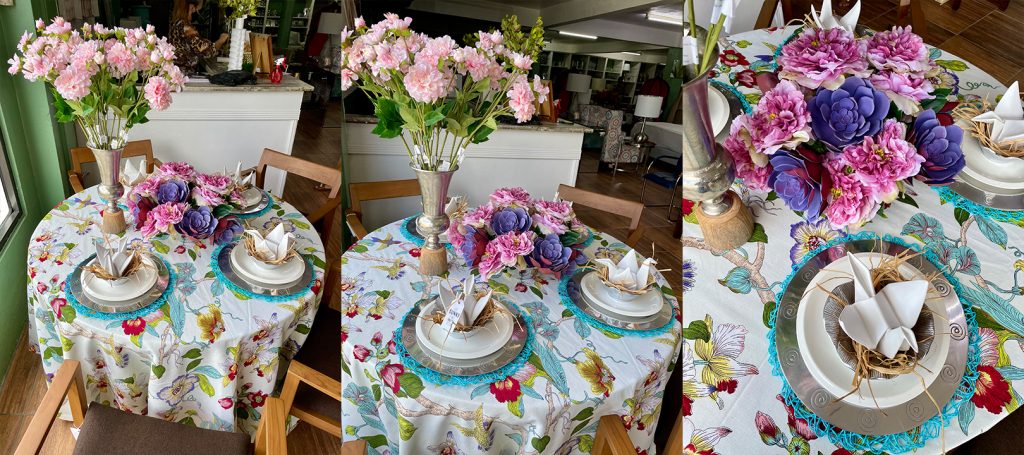
Spring Fleur: Begin by dressing the table with a floral tablecloth. For the centerpiece, utilize a trumpet urn of pink flowers and a silver bowl of peonies and succulents. Each table setting should have a brightly coloured place mat and silver charger plate. On top of these, add your plate and bowl. Inside each bowl, we placed our decorative origami bird. To create a nest like effect we added raffia (if you don’t have raffia, then little twigs from your yard will suffice) underneath each bird. For some humour….here is a FREE printable template with Easter sayings. |
DECORATING EASTER EGGS
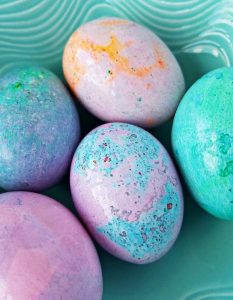 Hard boil your desired number of eggs and allow to cool completely.
- Prepare two separate bowls of hot water adding at least a teaspoon of vinegar to each. Place varying food colouring drops in each bowl and stir them separately.
- Place a hardboiled egg in each bowl and let it sit for one minute. Remove and let dry. You will have a new base colour for each.
- Prepare new bowls of warm water, adding varying food colouring drops once more. Stir and add vegetable oil to each bowl. Do not stir.
- Roll each egg in the bowls gently and soak for one minute. Remove and allow to dry on paper towels. There you have it!
- Feel free to repeat steps with varying colours that would contrast nicely.
HOT CROSS BUNS RECIPE
 Method:
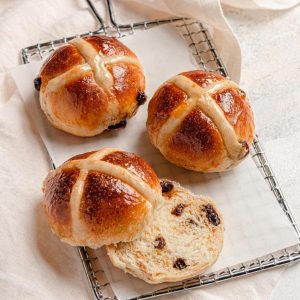 Boil the milk and then remove from the heat. Allow to cool until it reaches a warm temperature.
- Mix the warm milk, beaten egg and yeast.
- Using a dough hook in an electric mixer, mix the flour, sugar, salt, spices and sultanas. Add the liquid and mix until a dough forms. Once combined, add butter gradually and continue to knead with dough hook until an elastic consistency forms.
- On a lightly floured surface, divide the dough into 10 even pieces, and roll each piece into a smooth ball with your hands in a circular motion. Arrange the buns on a baking tray lined with parchment, leaving sufficient space so that the buns just touch when they rise and expand; approximately 2 cm between each. Cover with a clean damp tea towel and set aside to prove for at least an hour and thirty minutes.
- Heat the oven to 250C /482F /Gas 9.
- For the crosses, mix the flour and oil with about 5 tablespoons of water in a small bowl, adding the water one tablespoon at a time, to ensure you add just enough for a medium to t so that you add just enough for a thick paste.
- Spoon into a piping bag with a small nozzle and pipe neat crosses on each as seen in the photo provided.
- Bake for 20-25 minutes or until golden brown.
- For the glaze, gently heat the apricot jam with 1 tsp of water to melt it and mix in your cinnamon or mixed spice. Brush the warm jam over the top of the warm buns and let them cool. Pull apart for individual servings and enjoy!